People still use C?
I’ve been doing some development in C in my spare time, and it feels like everything online I find about various C topics are from some random university’s CS 352 course that was last published in 2003, and it’s usually a collection of slides that are totally useless without the lecture. To maybe help out any unfortunate souls who go down the same road, in this article I’m going to walk step-by-step how to set up a modern, usable development environment for C on Windows 10/11.
First things first, get out of Windows immediately
There are a few options for building C source in “native” Windows, and in my opinion, they’re all varying degrees of terrible. The majority of tooling for C was designed with GNU/Linux in mind, so why fight it? We’re going to use the Windows Subsystem for Linux (WSL) v2. For this to work, you need to be running Windows 10 Build 19041 (or higher), or Windows 11.
Luckily, in WSL2, Microsoft made installing WSL very easy. To install WSL with the default Ubuntu distribution, open up Command Prompt and run this command:
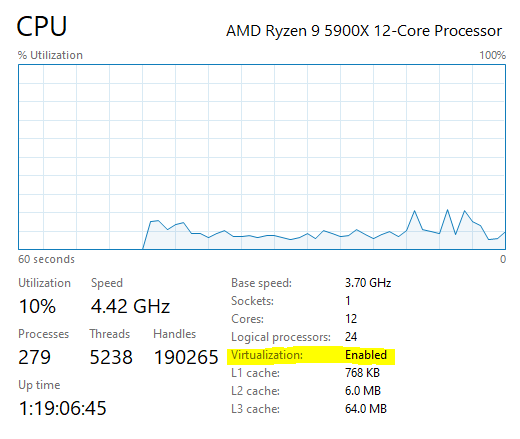
wsl --installIf you get an error about enabling virtualization, you’ll need to reboot into your computer’s BIOS settings and enable virtualization. You can check if virtualization is enabled in Task Manager > Performance > CPU:
You can also optionally install Windows Terminal, and nice wrapper around Powershell, Command Prompt, and your new Ubuntu terminal. Note that WSL doesn’t provide a GUI (by default), which is totally fine for our purposes.
After you install Ubuntu and run it for the first time, you’ll have to set up a new username and password. Then you should immediately update your new system:
$ sudo apt update

$ sudo apt -y upgrade
Let’s also create a folder we can use later for some testing:
$ mkdir devtestSetting up the compiler
Now let’s install our packages for our compiler, build/debug tooling, and base libraries. Ubuntu provides the build-essential package for this, but it’s overkill for C because it also includes the C++ compiler and tools for building dpkg packages. If you need that too, feel free to just use that package. For now, let’s get what we need:
$ sudo apt install -y gcc libc6-dev make gdb gitThat was easy.
Getting an IDE
We can compile our code now, but we don’t have a nice place to write it. Let’s fix that by installing Visual Studio Code. You can download the Windows version here. Click through the installer; the defaults are fine for us.
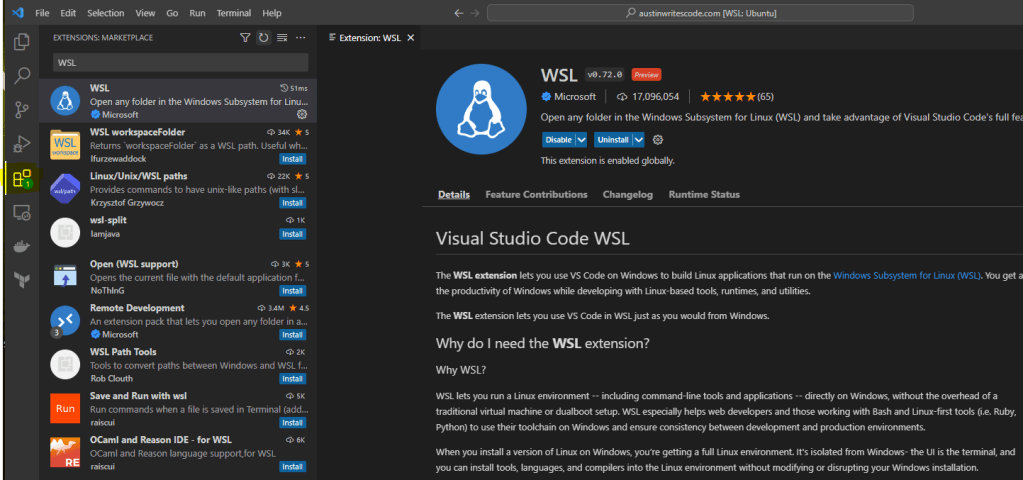
Once you have VSCode installed, you need to set it up so it can see the files in your WSL instance. Luckily, VSCode has a plugin for that. Click the “Extensions” icon on the sidebar and search for the “WSL” plugin, and click “Install”. You should also install the “C/C++ Extension Pack” to get IntelliSense and debugging features. You need to install the WSL extension first, so that the C Extension Pack is installed on WSL.
To open our devtest folder in WSL, hit F1 and type “WSL”, then select “Open Folder in WSL”.

You’ll get a dialog box to type the path (in Linux!) to your devtest folder. Hit OK, and you’ll get this dialog:

You can click “Yes, I trust the authors”, because I presume you trust yourself. You’ll then see your empty WSL folder, and if you make new files/folders you’ll see them appear in WSL (if you use ls to inspect them). Now the bottom of your VSCode window should indicate that you’re looking at a WSL folder:

Let’s write a little code, for fun
OK, now we’re going to set up VSCode to run your C code. You’ll probably want to be building and running your code with make, but using VSCode’s built-in debugger is nice for, well, debugging. Create a folder in your devtest folder called .vscode (if it doesn’t already exist), and create a file in it called tasks.json with the following content:
{

    "tasks": [

        {

            "type": "cppbuild",

            "label": "C/C++: gcc build active file",

            "command": "/usr/bin/gcc",

            "args": [

                "-fdiagnostics-color=always",

                "-g",

                "${file}",

                "-o",

                "${fileDirname}/${fileBasenameNoExtension}"

            ],

            "options": {

                "cwd": "${fileDirname}"

            },

            "problemMatcher": [

                "$gcc"

            ],

            "group": {

                "kind": "build",

                "isDefault": true

            },

            "detail": "Task generated by Debugger."

        }

    ],

    "version": "2.0.0"

}
This task will use our WSL gcc executable to compile our C source files into object files so we can run them. Let’s create a simple main.c in the root of our devtest project to test with:
#include <stdio.h>
int main() {
printf("Hello, world!");
return 0;
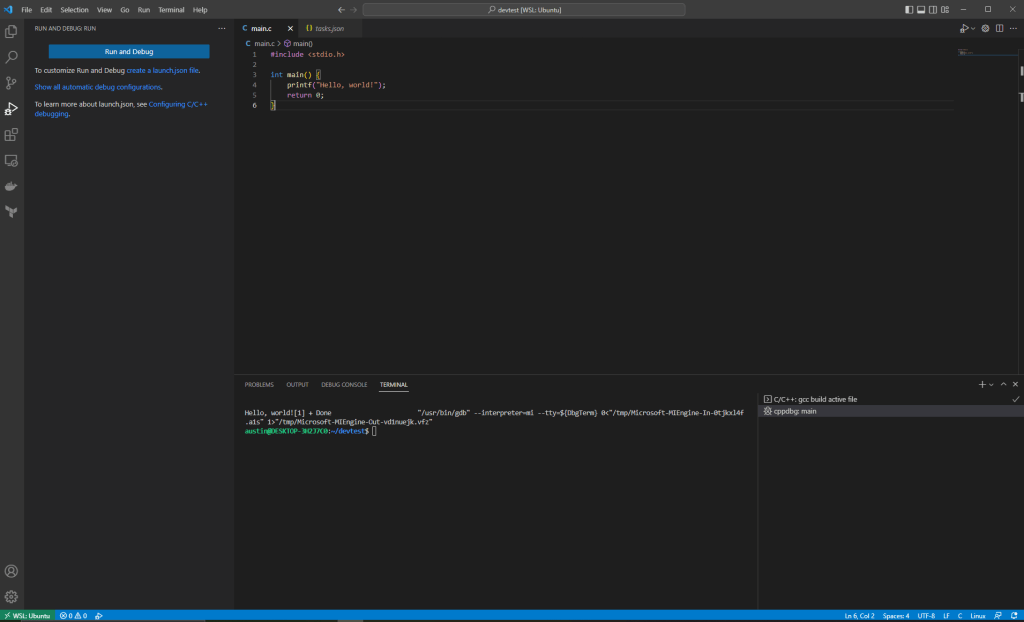
}Now if you hit F5, you should see VSCode switch to the debugging menu, and output ‘Hello, world!’ to the terminal.
Now you have an environment you can use to build applications in C on Windows. Happy coding!
